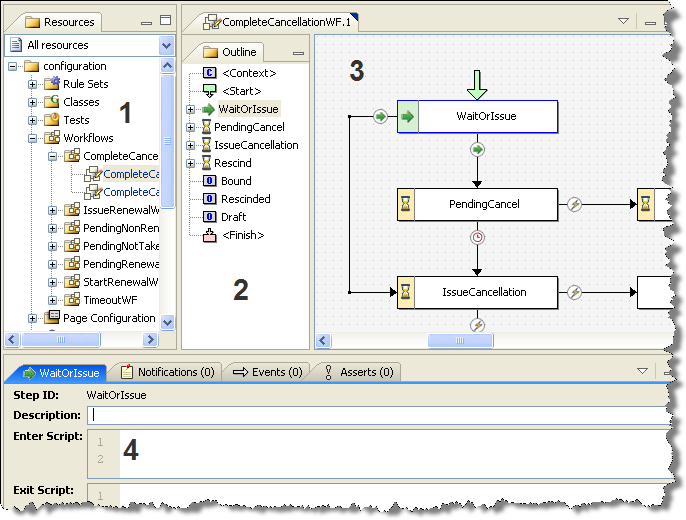
Workflow editor window
Within the Workflows editor, there are multiple work areas, each of which performs a specialized function:
Area |
View |
Description |
|---|---|---|
1 |
Tree view |
Studio displays each workflow type as a node in the Resources tree. If you have multiple versions of a workflow type, Studio displays each one with an incremental version number at the end of the file name. |
2 |
Outline view |
Studio displays an outline of the selected workflow process in the Outline pane. This outline lists all the steps and branches for the workflow in the order that they actually appear in the workflow XML file. You can re-order these steps as desired. You can also re-order the branches within a step. First, select an item, then right-click and select the appropriate menu item. |
3 |
Layout view |
Studio displays a graphical representation of the workflow in the workflow pane. You use this representation to visualize the workflow. You also use it to edit the defining values for each step and branch. |
4 |
Property view |
Studio displays detailed properties for the selected step or branch, much of which you can modify. |
For
example, in the PolicyCenter base configuration, Guidewire defines a
CompleteCancellationWF
script. In Studio, it looks similar to the following: